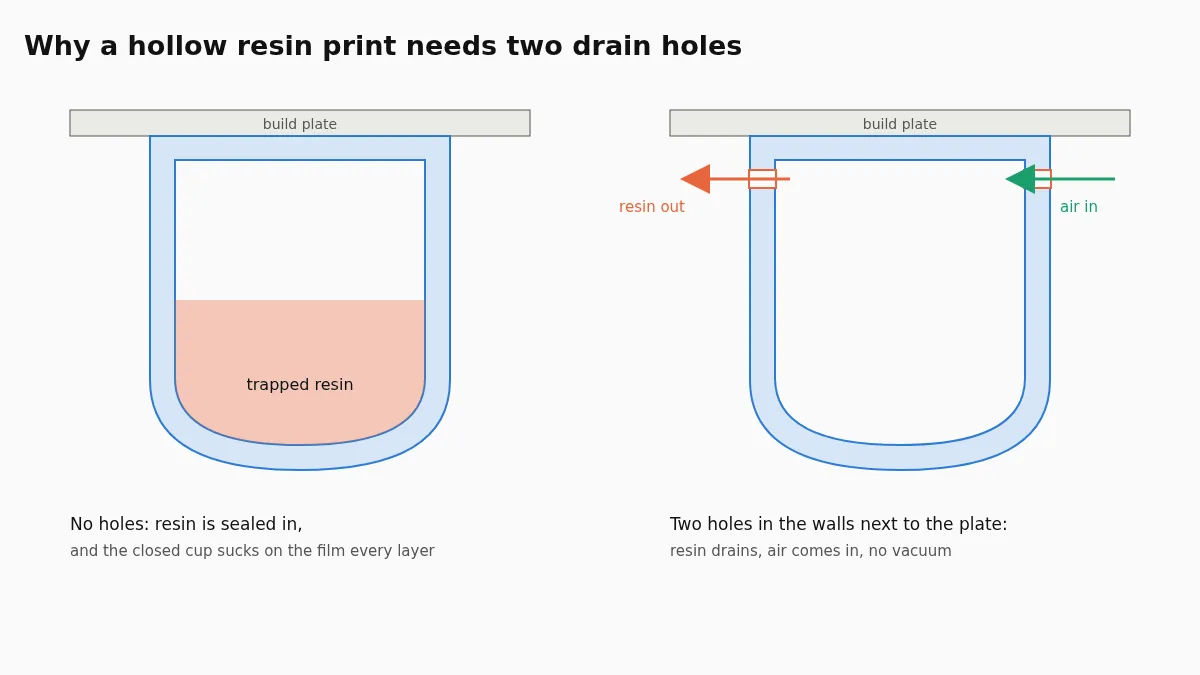
Give every cavity at least two drain holes, one near the build platform, drilled straight through the wall and about 3 to 4 mm wide. One lets resin out, the other lets air in, and together they stop the cavity acting as a suction cup.
Figures from Formlabs and Prusa were checked on their own pages on 7 November 2026. Where this guide gives a practical range rather than a published number, it says so.
A hollow resin print needs at least two drain holes per cavity: one as close to the build platform as possible and one more to let air in, each drilled straight through the wall and large enough for the resin to flow out, in practice 3 to 4 mm on most figures. Without them, liquid resin stays sealed inside the part and the closed cavity acts like a suction cup while it prints. If you hollow with our online STL hollowing tool, the holes are placed for you at the lowest points of every cavity and you can move them by clicking on the model.
What goes wrong without drain holes
Two separate problems, one after printing and one during it.
After printing, the resin that filled the cavity has nowhere to go. Prusa's documentation is direct about it: without drainage holes the uncured resin ends up trapped inside the finished print. It does not cure in the dark middle of the part, it keeps the inside liquid, and it can seep out of any crack or pore for a long time.
During printing, the cavity is open towards the resin tank until the last layers close it. Each layer is cured against the film at the bottom of the tank and then pulled off. A wall around an open cavity is a ring pressed against that film, and when it lifts, the space inside the ring is briefly a vacuum. Formlabs calls these areas cups and asks for an additional drain hole wherever they form. The force adds up layer after layer and can tear the part off its supports or deform the wall. A hole that lets air into the cavity removes the vacuum.
How many holes
Both Prusa and Formlabs ask for at least two. The reason for the second one is the same as with a can of liquid: with a single opening, air has to enter through the same hole the liquid is trying to leave, and the flow stutters or stops. With two, one becomes the outlet and the other the inlet.
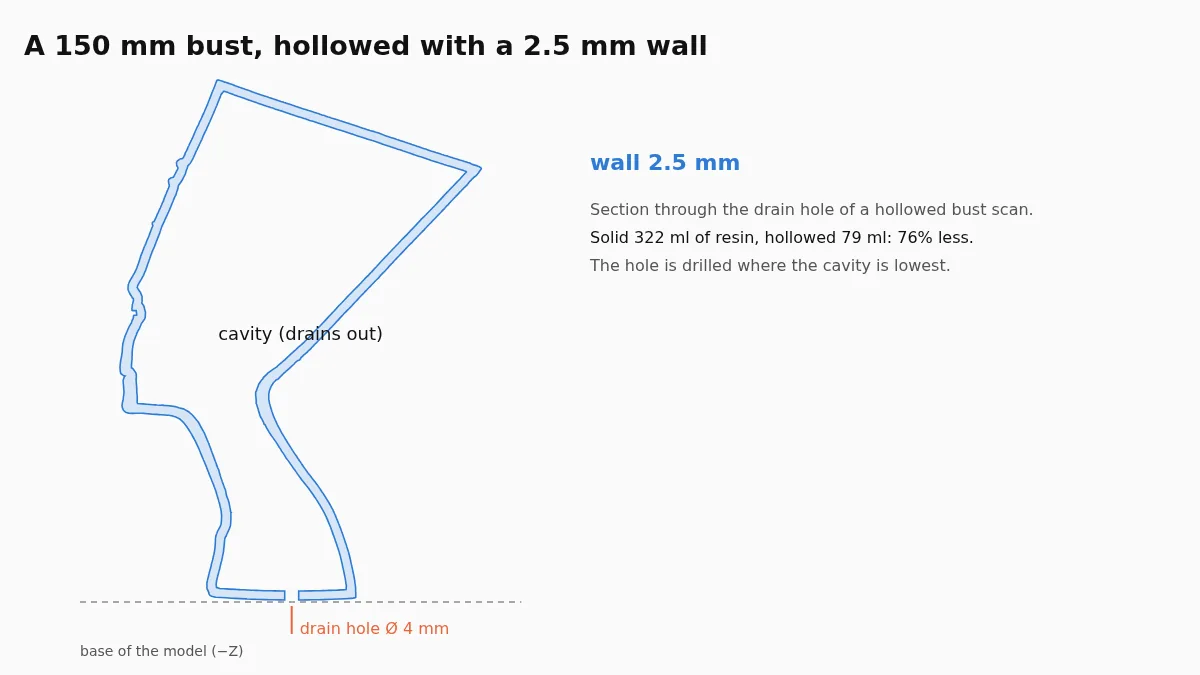
Count per cavity, not per part. A figure whose head is joined to the body by a narrow neck can hollow into two separate cavities, because the neck is too thin to have an inside of its own. Each cavity needs its own pair. Large or complicated cavities with several low points, such as the inside of a curled tail, may need a third hole at the second low point so nothing pools there.
Where to put them
- Near the build platform. Formlabs asks for one hole as close to the build platform as possible. That end of the cavity is printed first and closes the cup; a hole there lets air into the cup every time a layer peels off the film.
- At the lowest points of the cavity for the way you will drain it. Resin runs downhill; a hole halfway up a wall leaves everything below it inside.
- Straight through the wall. PrusaSlicer drills each hole perpendicular to the surface, which gives the shortest channel and the cleanest plug.
- On a surface nobody looks at: the base, the back, the underside of a cloak. A plug hides a hole well, but not perfectly on a smooth, visible face.
- Away from fine detail. A hole through a face, a hand or lettering destroys exactly the part you printed resin for.
Note that a hole on the very face that is glued to the build platform is no use while printing, because the platform covers it. Put it on the side wall just below.
How big
Formlabs' design guide for the Form 4 gives 0.75 mm as the smallest drain hole that still lets resin escape from an enclosed cavity. That is a floor, not a recommendation. A hole that small drains slowly, can be closed by a drop of resin curing in it and is hard to rinse through.
In practice, 3 to 4 mm drains most figures and busts in a reasonable time and still takes a neat plug. Large prints, thick resin and long, narrow cavities benefit from 5 to 8 mm. These are working ranges from common practice, not published limits, so adjust them to your resin and your patience.
Plugging the holes
A plug is a short cylinder that fills the hole. Printing it with the model, from the same wall, gives it the same surface curvature as the part. It needs a little clearance to slide in: our hollowing tool cuts plugs 0.15 mm smaller all round than the hole. After washing and a full drain, push the plug in with a drop of the same resin, cure again, and sand the joint flush.
Draining and rinsing in practice
Holes only help if the resin actually leaves through them. Before you take the part off the platform, let it hang over the tank for a few minutes so most of the resin inside runs back where it came from. Then turn the part so the holes point down and let it drip again; a cavity with a single low point empties quickly, one with several pockets needs turning in more than one direction.
Rinse the inside as well as the outside. Formlabs points out that the drain holes are also what lets the washing liquid flow through the part, so a part that only sat in the wash with its holes facing up comes out clean outside and still full of thin resin inside. Shaking it in the wash with the holes open, or squirting liquid into one hole until it runs clear from the other, does the job. Let the cavity dry completely before you cure and plug; liquid trapped behind a plug stays there.
A quick checklist before you print
- Every cavity has at least two holes, and you know where each cavity is. A section view shows this best.
- One hole of each pair is near the build platform, on a side wall rather than on the face that touches it.
- Holes are at the low points for draining, not on fine detail or a visible face.
- Diameter is 3 to 4 mm for figures, more for large parts; never near the 0.75 mm floor.
- The wall is thick enough to survive washing: see how to hollow an STL for resin printing for measured wall and resin figures.
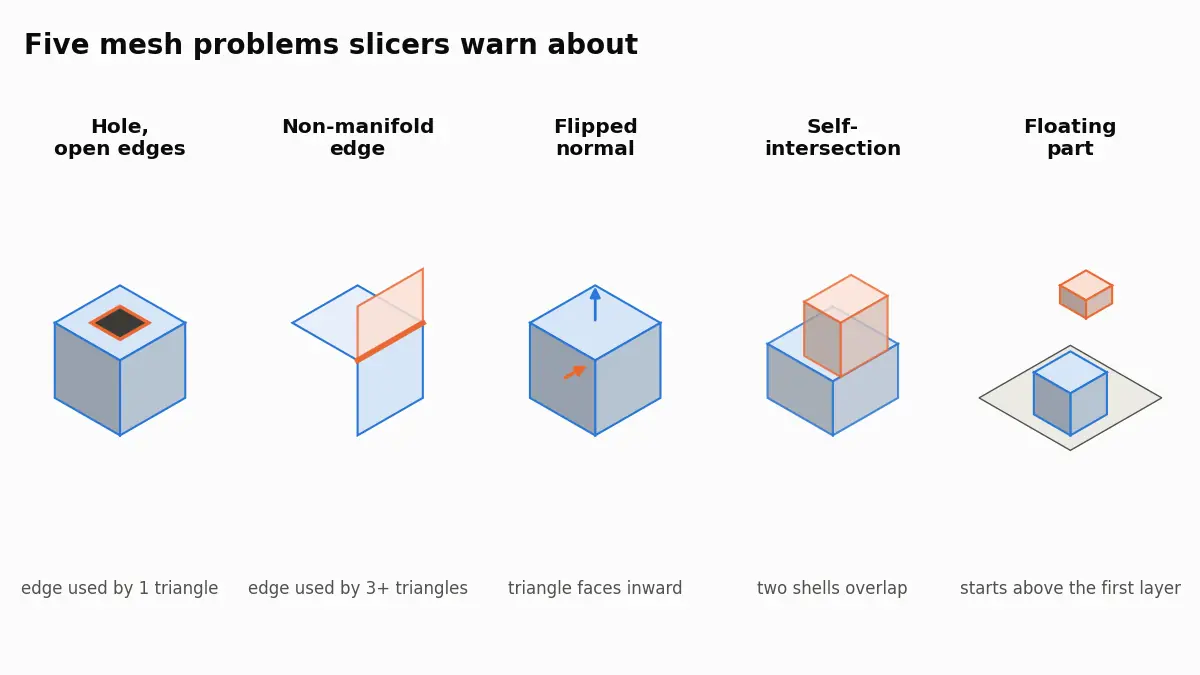
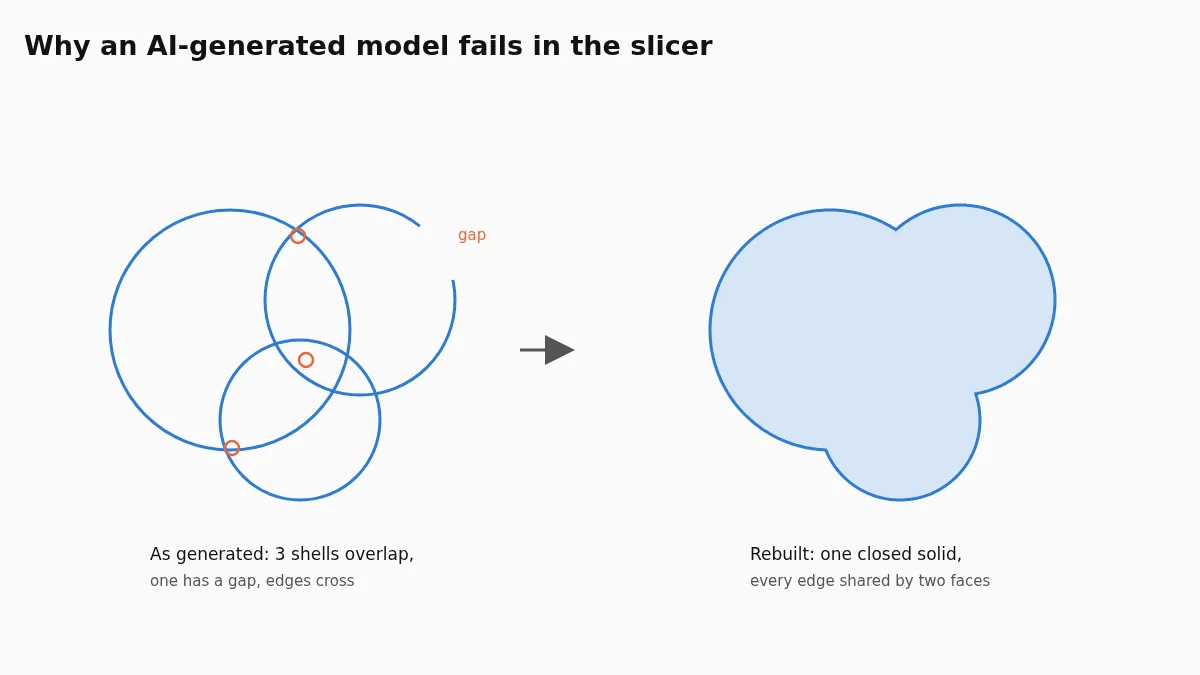
- The model was a closed solid before hollowing. If your slicer reported errors, read what slicer STL errors mean first.