3D printing & STL6 min read
Drain holes for hollow resin prints: how many, how big, where
Why a hollow resin print needs two drain holes per cavity, where they go, how large they should be and how to plug them, with the published Formlabs minimum.
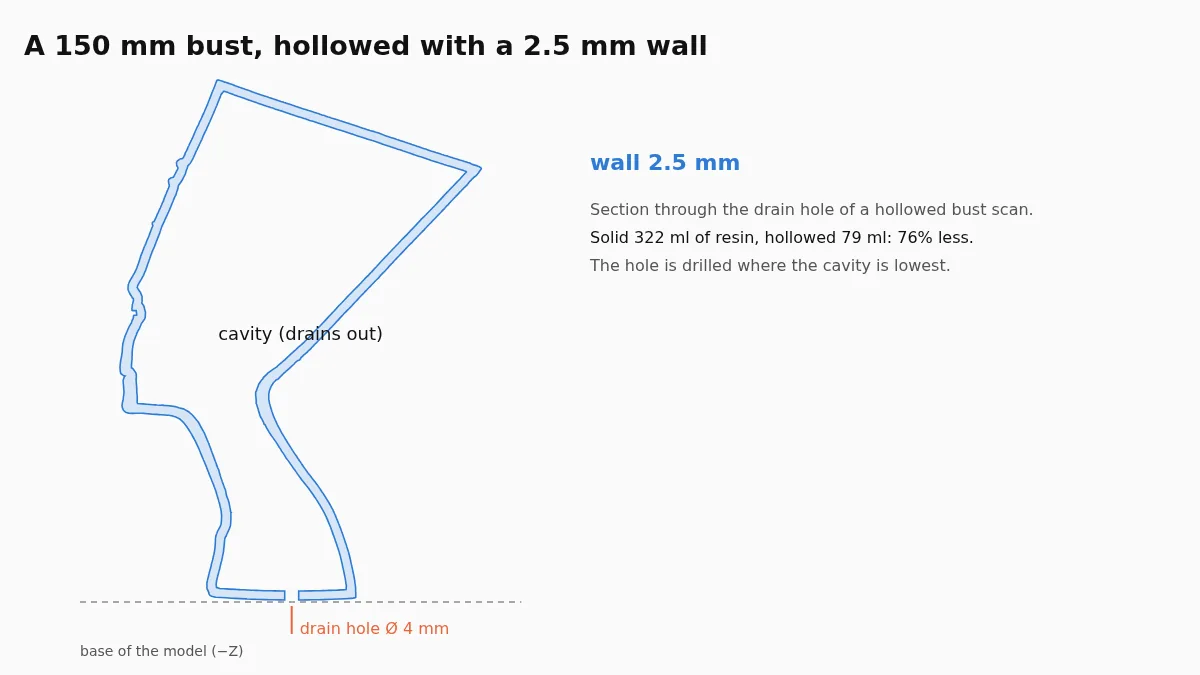
Keep a 2 to 2.5 mm wall, drill at least two drain holes into the cavity and plug them after curing. Compact models such as busts use about three quarters less resin; slender figures save less because thin parts stay solid.
Resin figures in this guide were measured on 7 November 2026 with our own hollowing tool on seven public test scans scaled to 120 to 150 mm. Recommendations from Prusa, Formlabs and Lychee were checked on their own pages, linked at the end.
To hollow an STL for resin printing, keep an outer wall of about 2 to 2.5 mm, remove everything inside it, and drill at least two drain holes into the empty space so that liquid resin can run out and air can get in. On a compact model such as a bust that cuts the resin by three quarters. You can do it in a slicer with a hollowing function, or hollow the STL online with drain holes and plugs in one step and check the wall in a section view before you download.
More than most people expect on chunky models, and less than they hope on thin ones. Prusa's own example goes from 237 ml of resin solid to 81 ml hollowed, and Formlabs reports a 77 percent saving on its demonstration part with a 2 mm wall. Our measurements on seven well-known test scans land in the same range for compact shapes and well below it for slender ones:
| Model (height) | Solid | 2 mm wall | 2.5 mm wall |
|---|---|---|---|
| Max Planck bust (120 mm) | 284.5 ml | 83% saved | 79% saved |
| Nefertiti bust (150 mm) | 322.3 ml | 80% saved | 76% saved |
| Armadillo figure (120 mm) | 118.7 ml | 64% saved | 58% saved |
| Happy Buddha (120 mm) | 78.8 ml | 56% saved | 49% saved |
| Ogre figure (100 mm) | 42.5 ml | 55% saved | 47% saved |
| Lucy statue (150 mm) | 67.6 ml | 47% saved | 40% saved |
| Dragon (150 mm long) | 63.4 ml | 46% saved | 38% saved |

The pattern is simple. A part only has an inside if it is thicker than two walls. A bust is one big rounded volume, so almost everything goes. A dragon is wings, tail and claws, most of which are thinner than 4 or 5 mm and stay solid. That is correct behaviour, not a failure, and it is why the same wall gives such different savings.
Prusa sets the minimum at 1 mm. Lychee's guidance is a useful map of the range: 1.5 to 2 mm for small decorative pieces and miniatures, 2.5 mm, its default, for most prints, and 3 to 4 mm for parts that must be strong or take stress. Formlabs points out the trade-off plainly: thinner walls use less material, and a thin shell makes a large model fragile.
The saving shrinks slowly as the wall grows, so the safer choice is cheap. On the Nefertiti bust the step from 2 to 2.5 mm adds 14 ml of resin, about 4 percent of the solid volume; on the Max Planck bust it adds 11 ml. A cracked print costs all of that resin again, 50 to 80 ml on these busts.
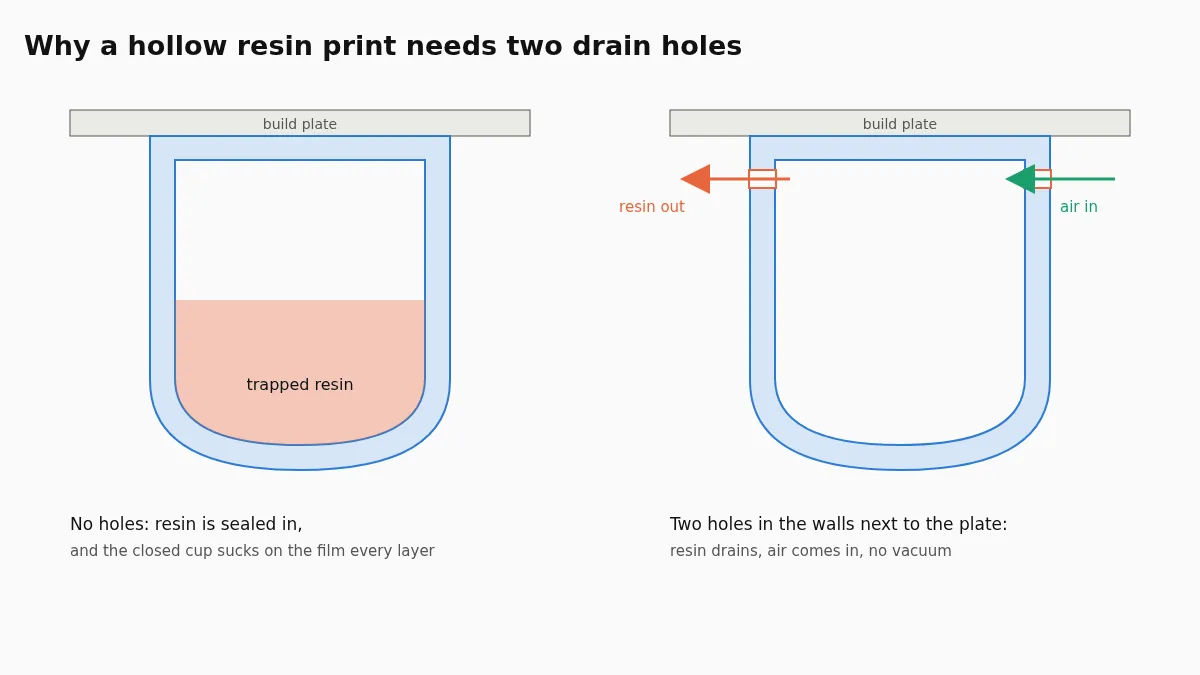
A hollow part with no hole is a sealed bag of liquid resin. Prusa warns that without drainage holes the uncured resin ends up trapped inside the finished print, and both Prusa and Formlabs ask for at least two holes. Formlabs wants one of them as close to the build platform as possible, plus more wherever the cavity forms a cup. Two holes matter because one lets resin out while the other lets air in. Size, placement and the suction-cup effect have their own guide: drain holes for hollow resin prints.
Every separate cavity needs its own holes. A figure with a thin neck can end up with two cavities, one in the head and one in the body, joined by solid material. A hole in the body does nothing for the head.
Drain holes leave openings in the surface. If they are on the base nobody sees them; if they are not, print a plug for each one. A plug cut from the same wall with a small clearance, about 0.15 mm all round, slides in and can be fixed with a drop of resin and a short second cure, which closes the surface again. Formlabs notes that the holes also let the washing liquid flow through the part, so rinse the inside as well as the outside and let it drain fully before curing.
The tool reports the solid and hollow volume, the thinnest wall actually left and the share of the surface that stayed solid. If no part of the model is thick enough to hollow, you get a message instead of a file, and nothing is charged. Before printing, open the result in your slicer and estimate the job once more; the STL analyzer gives the volume, weight and print cost from the same file.
Most resin slicers can hollow: PrusaSlicer, Lychee and Chitubox all have it, with wall thickness and drain hole tools. That is the quickest route when you print the file yourself on one printer. The hollow model then lives inside the slicer project, and every time you load the original STL again, you hollow it again.
Hollowing the file itself is better when the model goes to someone else, a print service or a second slicer, when you want to check the wall in a section before committing resin, or when the slicer struggles with a large sculpt. The result is an ordinary STL with the cavity, the holes and the plugs already in it, so any slicer prints it the same way.
About 2 mm for small and medium figures and 2.5 to 3 mm for large or handled pieces. Prusa gives 1 mm as the minimum and Lychee uses 2.5 mm as its default. Thinner walls save more resin but crack more easily.
On compact models a lot: 76 to 83 percent on the two busts we measured. Slender figures save less, 38 to 64 percent in our tests, because limbs and wings thinner than two walls stay solid.
Yes. One lets resin out while the other lets air in, and without them the uncured resin stays trapped inside. Both Prusa and Formlabs ask for at least two, one of them close to the build platform.
Only areas thicker than two walls have an inside. Arms, fingers, wings and thin bases are thinner than that, so they are printed solid. This is expected and the hollowing report shows how much of the surface it applies to.
It has to be a closed solid first. Small holes are closed automatically; a model with overlapping parts from an AI generator is better rebuilt as one solid before hollowing.
Why a hollow resin print needs two drain holes per cavity, where they go, how large they should be and how to plug them, with the published Formlabs minimum.
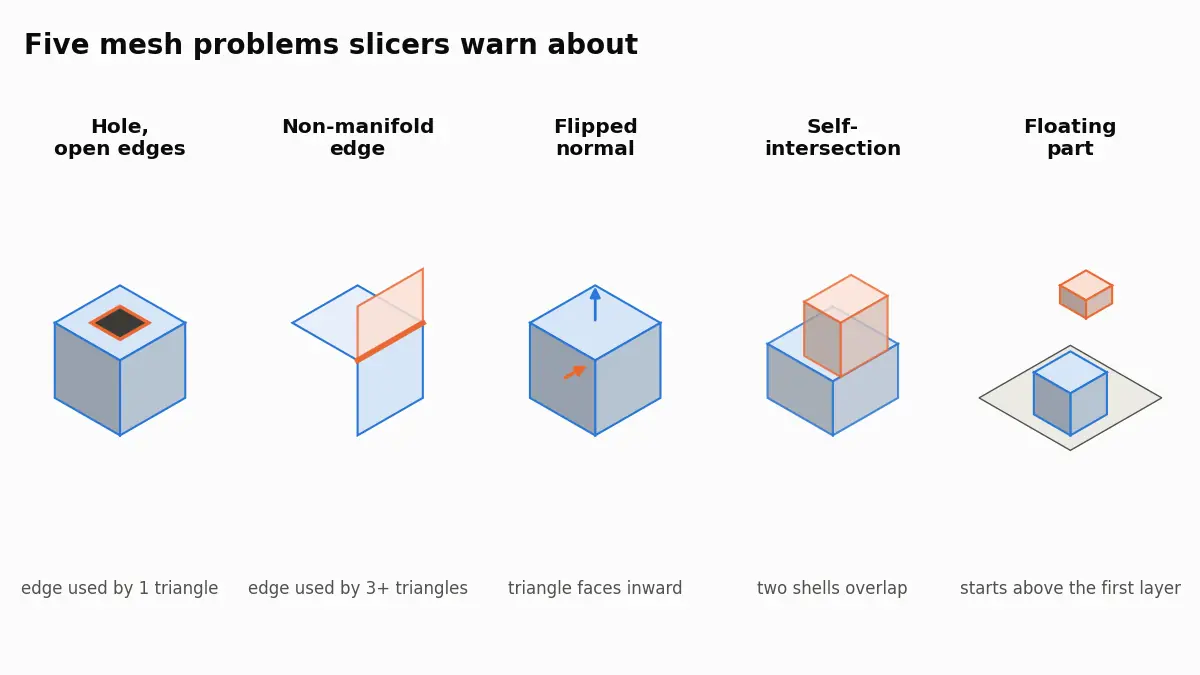
What PrusaSlicer, Bambu Studio and Cura mean by open edges, non-manifold edges, reversed faces and floating parts, and how to repair the STL behind them.
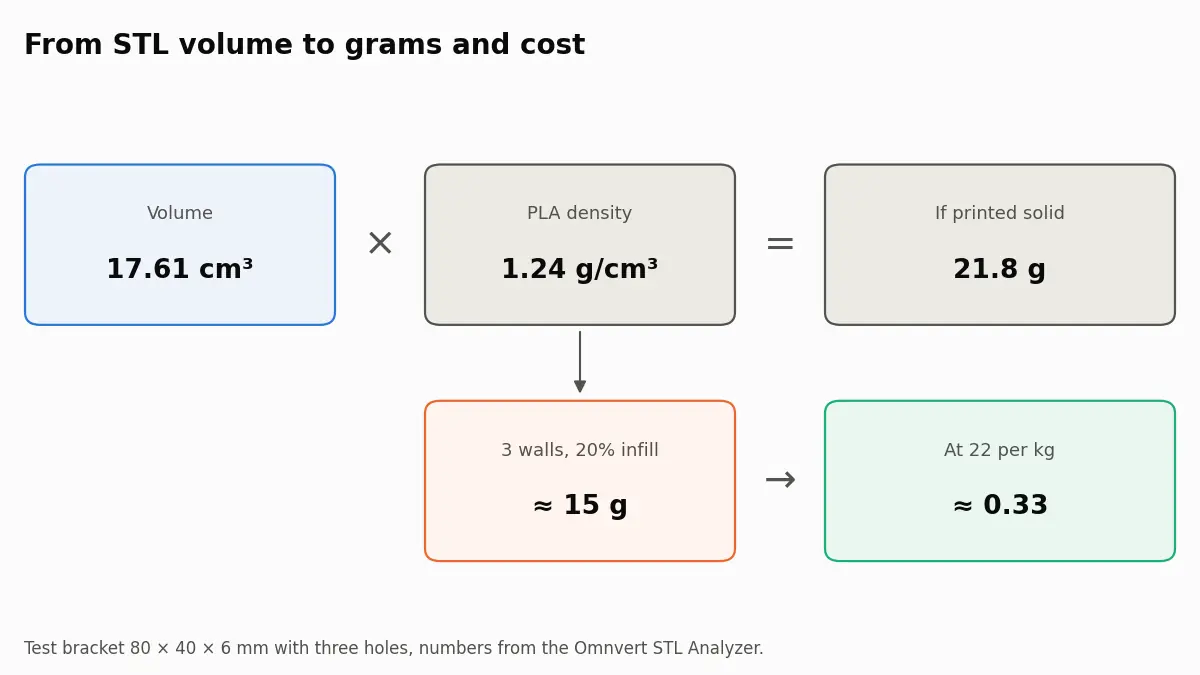
Turn an STL's volume into grams and cost: filament densities from data sheets, how walls and infill change the weight, and how far an estimate can be trusted.