3D printing & STL6 min read
STL volume, weight and cost: check a model before you print
Turn an STL's volume into grams and cost: filament densities from data sheets, how walls and infill change the weight, and how far an estimate can be trusted.
A lithophane is a thin white plate whose thickness follows a photo. Set about 0.8 mm for the brightest point and 3 mm for the darkest, print in white PLA at 100% infill with fine layers, and put a light behind it.
Print settings checked on 1 October 2026 against Bambu Lab's and Prusa's own lithophane guides, linked below. Where the two makers disagree, both views are given.
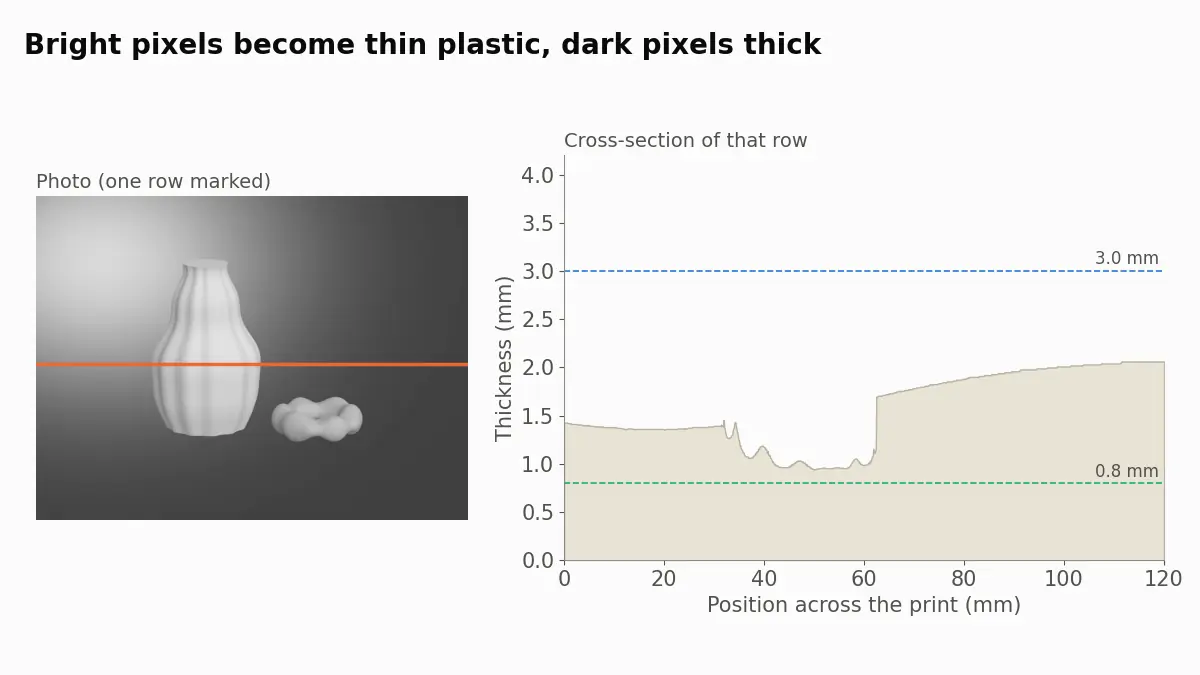
To make a lithophane, turn a photo into a thin plate whose thickness follows the picture: thin where the photo is bright, thick where it is dark. Start from a sharp, well-lit photo, set the thinnest point around 0.8 mm and the thickest around 3 mm, choose the print width, and export an STL. Print it in white PLA at 100% infill with fine layers, then hold it against a light. The lithophane maker turns a photo into an STL with a backlit preview, so you can judge contrast before you spend two hours printing.
White PLA lets some light through and absorbs the rest, and each extra millimetre absorbs more. Seen from the front with a lamp behind it, a thin area glows and a thick area looks dark. The plate is nearly featureless in daylight and only shows the picture when lit from behind, which is the whole effect.
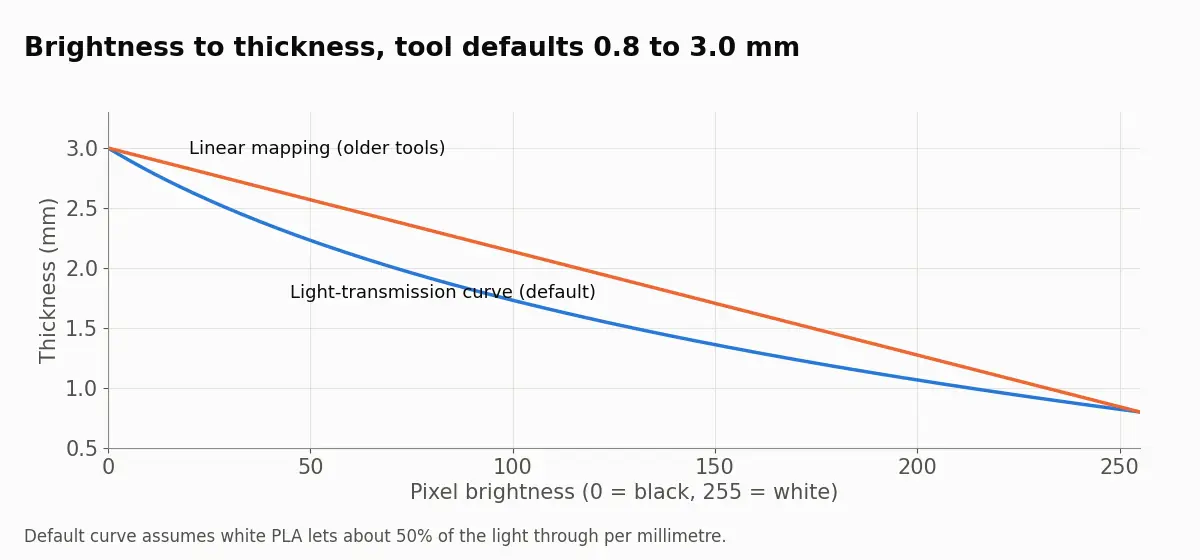
Light does not fade in a straight line through plastic; it falls off exponentially. That is why the Omnvert tool, by default, maps brightness to thickness along a light-transmission curve rather than a straight line. It assumes white PLA passes about 50% of the light per millimetre, and you can change that figure under Advanced.
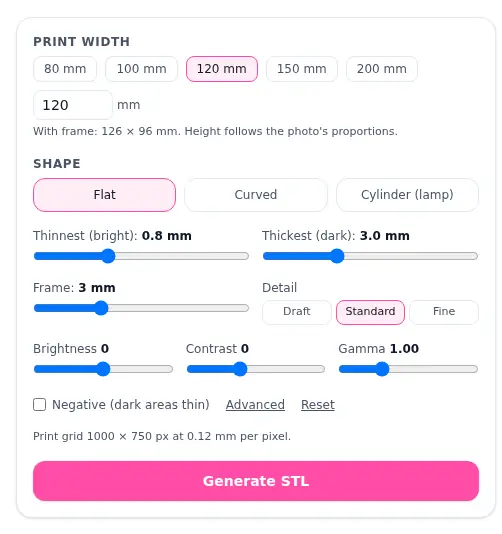
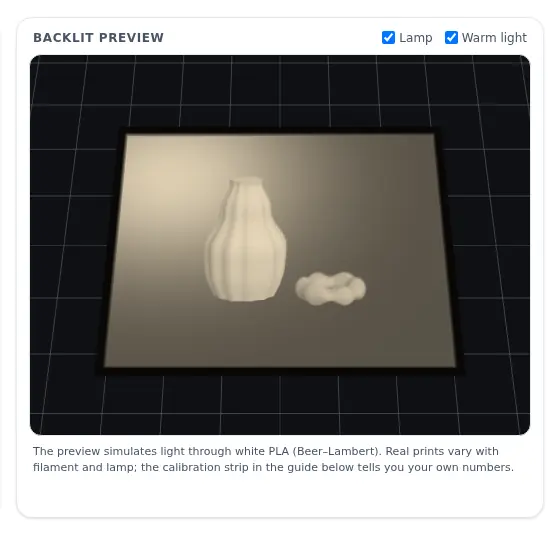
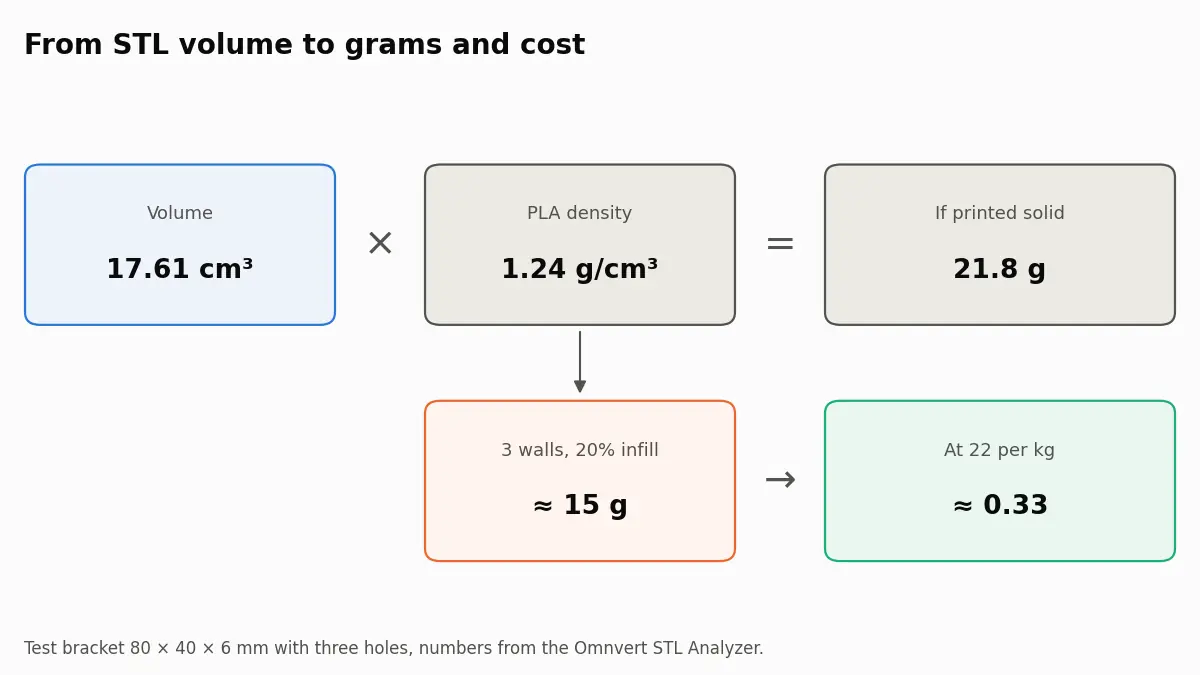
When the preview looks right, generate the lithophane STL and take it to your slicer with the settings below. To see how much filament it will use, drop the STL into the STL analyzer; at 100% infill the solid weight it reports is the estimate. Our guide to STL volume, weight and cost explains the numbers.
| Setting | Value | Why |
|---|---|---|
| Filament | White PLA | Even light transmission; Bambu Lab uses Jade White, Prusa uses Vanilla White |
| Infill | 100% | Any gap shows as a pattern when lit; Bambu Lab specifies 100%, Prusa at least 90% |
| Layer height | 0.08 to 0.12 mm | Bambu Lab's range; Prusa uses 0.1 mm |
| Nozzle | 0.4 mm, or 0.2 mm for fine detail | Bambu Lab recommends 0.2 mm for its lithophane kit |
| Speed | Slower than usual | Thin areas and tall, thin plates benefit from less vibration |
Sources: Bambu Lab's lithophane printing instructions and its lithophane kit page, and two Prusa articles, the picture to 3D model guide and the 2024 colour lithophane article.
This is where advice splits. The Omnvert tool's result card suggests printing the plate standing up. Prusa's guide prints it flat to avoid the wobble a tall, thin plate can have. Both work; they trade different things.
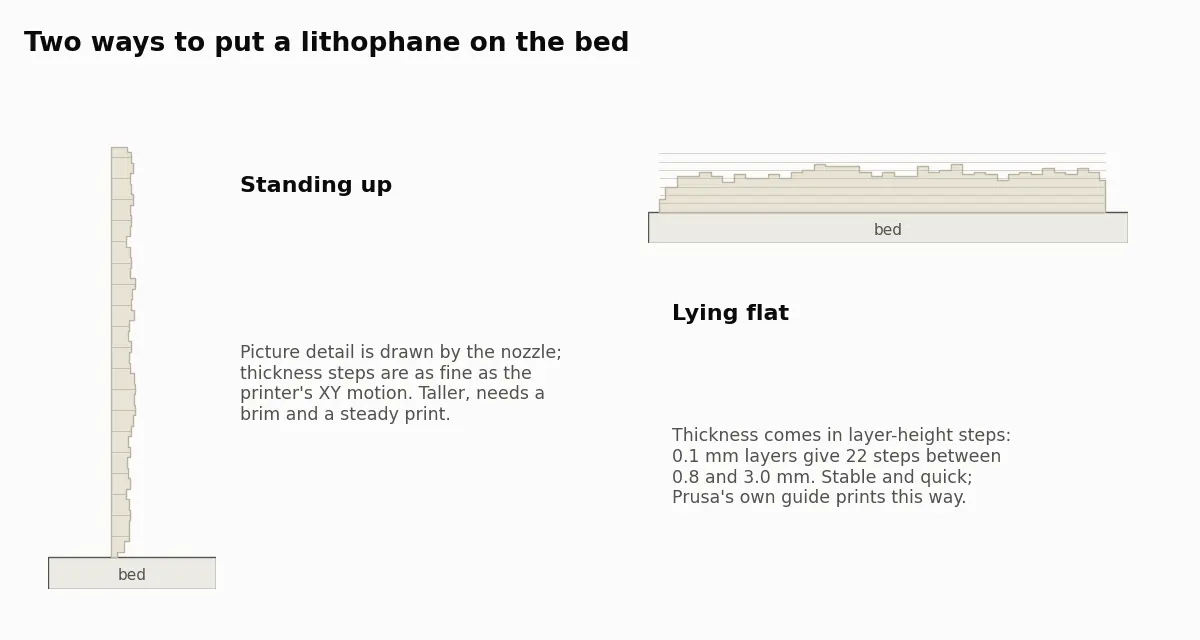
Standing up, each layer is a horizontal slice of the picture and the thickness comes from the nozzle's XY movement, which is finer than a layer. It needs a brim, a steady printer and slower speeds. Flat, the thickness is stacked in layers, so 0.1 mm layers give 22 steps between 0.8 and 3.0 mm; it is quicker and very stable, and with fine layers the steps are hard to see. If your printer wobbles on tall parts, print flat. If you do print upright, stand a landscape plate on its long edge: a 120 × 90 mm lithophane then rises 90 mm instead of 120, wobbles less and finishes sooner.
A neutral or warm white LED behind the plate, a few centimetres away, shows the most detail. A bare bulb too close makes a bright spot; a diffuser or a little distance spreads it. The cylinder shape is made for a lamp: a small LED puck or string inside does the job; keep hot bulbs away, because PLA softens at low temperatures. The preview's Lamp and Warm light switches show roughly what each looks like.
The preview is a simulation for white PLA; a different filament, a thicker wall or a weak lamp changes the result, which is why a small test print at the final settings is worth it. The tool works from brightness only, so colour photos become grey lithophanes; full-colour lithophanes need a multi-filament printer and a different workflow. If the result card ever reports open edges, run the file through STL Repair before slicing. For the image side of the job, the tutorial on preparing a height map covers contrast and smoothing in more depth, and image to STL is the tool for logos and flat relief instead of photos.
A common range is about 0.8 mm at the brightest point and 3 mm at the darkest, which is also the tool's default. Thinner bright areas are fragile, and a much thicker maximum needs a stronger lamp to show the dark tones.
100%. Bambu Lab's lithophane instructions specify 100% rectilinear infill and Prusa recommends at least 90%. Any gap inside the plate shows up as a pattern when it is lit from behind.
Both work. Standing up gives smooth thickness from the nozzle's movement but needs a steady printer and a brim. Flat is quicker and stable, and Prusa's guide prints it that way; with 0.1 mm layers the thickness steps are hard to see.
White PLA. It transmits light evenly and gives a neutral image. Coloured or very translucent filaments change both the tint and the contrast.
The preview uses WebGL. If your browser or device has it turned off, the preview stays empty, but the STL is still generated and downloads normally.
Turn an STL's volume into grams and cost: filament densities from data sheets, how walls and infill change the weight, and how far an estimate can be trusted.
Why STL files get large, how to read the triangle count straight from the file size, and what binary, re-export, decimation and 3MF each save in practice.
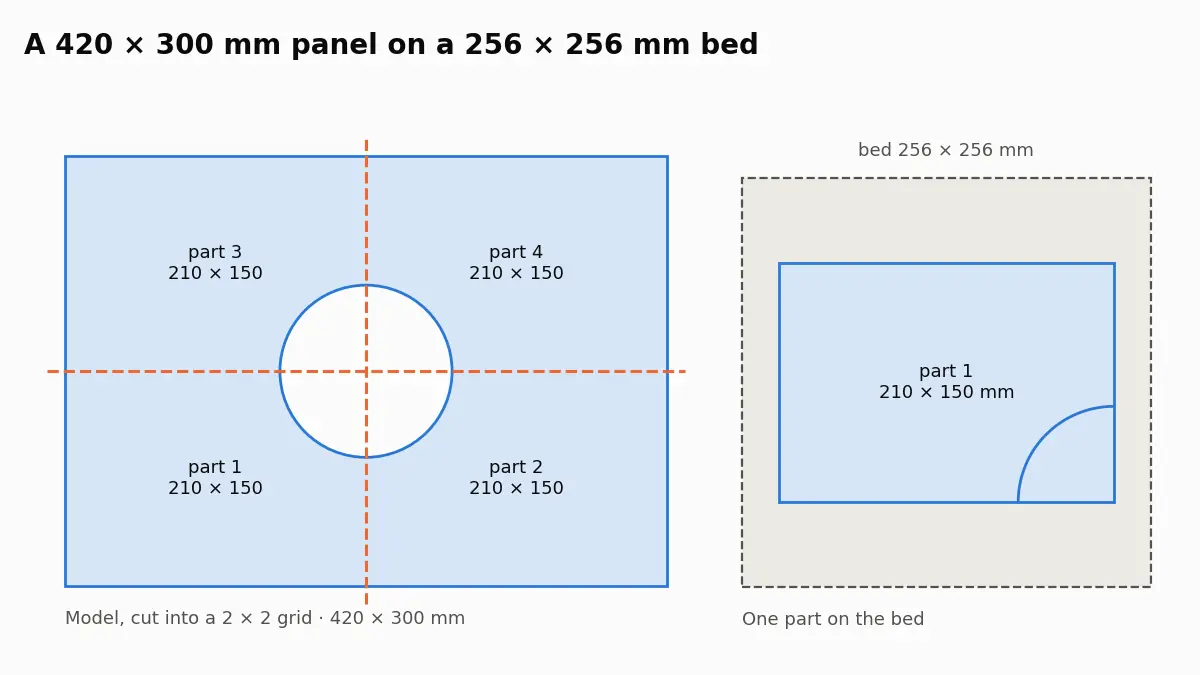
Bed sizes of common printers, how cutting an STL into parts works, margins, orientation and how to join the parts with glue, pins or dovetails.